
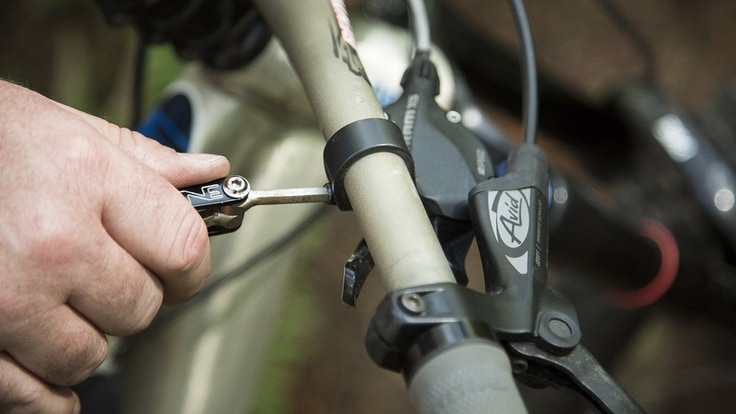
To adjust bike brakes, you need a brake adjustment tool. This tool helps to tighten or loosen the brake cable tension and adjust the position of the brake pads.
If you’re struggling with loose or faulty brakes on your bike, this is the tool you need. As a cyclist, it’s essential to know the importance of properly functioning brakes for your safety on the road. With the use of a brake adjustment tool, you can easily rectify any issues with your bike brakes and ensure a smooth and safe cycling experience.
In this article, we’ll take a closer look at the brake adjustment tool and provide you with some tips on how to use it effectively.
Credit: www.rei.com
Bike Brakes: An Essential Component For Safe Cycling
For cycling enthusiasts, bike brakes are essential for safe and enjoyable riding. But how do they work? And why are they so important? Let’s delve into this topic deeper.
Brief Overview Of The Importance And Function Of Bike Brakes
Bike brakes are responsible for stopping your bike’s motion, ensuring you can safely control your speed and come to a complete stop when needed. They usually comprise a lever mounted on your handlebars and a caliper that gets activated whenever you press the lever.
The caliper squeezes the bike’s rim, creating friction and stopping the bike’s motion.
Some key points to bear in mind include:
- Different types of bikes have different types of brakes. For instance, road bikes and mountain bikes may have different brake mechanisms.
- You need to keep your brakes in good working condition to enhance your safety as a cyclist. This means inspecting them regularly and replacing worn-out parts immediately.
- Always use the right brake lever to stop – the left controls the front brake, while the right controls the rear.
- The nature of your brake’s performance may be influenced by factors like weather, bike load, and terrain. Always anticipate possible changes in braking power as you ride.
Discussion Of The Impact Of Faulty Or Poorly Maintained Brakes On Safety And Performance
Your bike’s brakes are not just essential for your safety – they also impact your bike’s performance. Faulty or poorly maintained brakes can lead to serious accidents and negatively affect your overall performance. Let’s take a look at some potential risks:
- Poor brake function can lead to accidents or crashes when cycling at high speeds, making it challenging to stop your bike or steer it.
- Injuries can occur if a cyclist is unable to brake effectively to avoid an obstacle or other road users.
- Poor braking performance can also lead to excessive wear and tear on your bike’s rims and cause faster degradation of its braking system.
- Lastly, poorly maintained brakes can negatively impact your bike’s overall performance, leading to a less comfortable or less enjoyable cycling experience.
Therefore, it is critical to maintain your bike’s brakes and invest in quality brake components to ensure safe and reliable braking performance. Don’t skimp on your bike’s brakes – your safety and riding experience depend on it.
Purpose Of The Article
Fixing Bike Brakes Like A Pro: Introduction Of The Topic And Intended Audience
If you own a bike, it’s essential to know how to fix your bike brakes properly. Not only will it save you time and money, but it will also ensure that you enjoy a smooth and safe riding experience. As a cycling enthusiast, you want to learn how to fix your brakes like a pro.
But where do you begin? This article is intended for those who want to learn how to maintain their brakes, either for personal use or as a professional bike mechanic.
This article is intended to inform and educate individuals who own bikes about the benefits of learning how to fix bike brakes. The primary focus is to provide the reader with necessary knowledge of the critical tools required to adjust bike brakes and their significance in maintaining a safe biking experience.
The article will explain the key benefits of learning how to fix bike brakes, followed by a detailed explanation of the various tools required for adjusting bike brakes.
Benefits Of Learning How To Fix Bike Brakes
Learning how to fix bike brakes provides numerous benefits to bike owners and enthusiasts. Here are just a few:
- Saves money: Bike maintenance can be expensive, especially if you take your bike to a mechanic for basic repairs. Learning how to fix bike brakes will save you a considerable amount of money in the long run.
- Ensures safety: Maintaining your bike brakes ensures a safe riding experience. Faulty brakes can cause accidents, especially when going downhill or at high speeds.
- Extends the bike’s lifespan: Regular maintenance of the bike brake system can extend the bike’s lifespan by preventing wear and tear.
- Enhances riding experience: Well-maintained brakes offer a smooth and enjoyable riding experience.
Tools Required For Adjusting Bike Brakes
Here are the fundamental tools required to adjust bike brakes:
- Allen wrenches: Allen wrenches come in many sizes and are crucial for adjusting brake pads’ position and tightening bolts.
- Cable cutters: Cable cutters are essential for cutting cables and housing, creating a clean edge on the cables’ ends.
- Adjustable wrenches: Adjustable wrenches are versatile tools for tightening nuts and bolts on the bike’s brake systems.
- Needle-nosed pliers: Needle-nosed pliers are handy for holding and guiding brake cables and housing.
- Screwdrivers: Screwdrivers are necessary for tightening screws on brake levers and shifting components on the bike.
- Lubricant: Lubricants are necessary for keeping the brake system clean and rust-free.
Learning how to adjust bike brakes provides an excellent opportunity for bike owners and enthusiasts to maintain their bikes correctly and ensure a safe riding experience. When it comes to adjusting bike brakes, the essential tools required are the allen wrenches, cable cutters, adjustable wrenches, needle-nose pliers, screwdrivers and lubricants.
By investing in these tools and learning how to use them, you can save money and enhance your riding experience.
Brake Pads
What tool do i need to adjust bike brakes: brake pads
Maintaining your bike’s brake pads is crucial for safe cycling. In this section of the blog post, we will explore the function and importance of brake pads, the different types of brake pads available, and advice on choosing the right brake pads for your bike.
Explanation Of The Function And Importance Of Brake Pads
Brake pads are a crucial component of a bike’s braking system. They are essentially small plates that attach to the brake arms and provide friction against the wheel rims when the brakes are applied. This creates the pressure needed to bring your bike to a stop.
Here are some key points to keep in mind:
- Brake pads are essential for braking performance and rider safety.
- Over time, brake pads can wear down and lose effectiveness, making them less reliable and less safe.
- Regular brake pad maintenance is crucial to ensure your brakes function properly when you need them most.
Discussion Of The Different Types Of Brake Pads Available
There are several different types of brake pads available on the market. They vary in terms of material, durability, and price. Here are some of the common types of brake pads:
- Rubber or rubber compound brake pads are the most common and affordable type of pads. They are suitable for most types of bikes and riding styles but may wear more quickly than other types.
- Metallic brake pads are more durable than rubber pads and provide better stopping power, making them ideal for off-road or mountain biking. However, they can be noisier and may wear down rims more quickly.
- Ceramic brake pads offer good stopping power and are more resistant to wear and heat than other types of pads. They may also be quieter than metallic pads. However, ceramic pads can be more expensive.
Advice On Choosing The Right Brake Pads For Your Bike
Choosing the right brake pads for your bike depends on several factors, including your riding style, bike type, and personal preferences. Here are some things to consider:
- Consider the type of bike you have. Different bikes may require different types of brake pads.
- Determine your preferred riding style. If you prefer off-road biking, for example, you may want to opt for metallic pads for better stopping power.
- Consider your budget. Different types of brake pads can vary greatly in price.
- Read product reviews and get recommendations from other cyclists to help you make an informed decision.
Brake pads are a vital component of a bike’s braking system, and regular maintenance is essential for safety and optimal performance. Choosing the right type of brake pad for your bike can enhance your cycling experience and help keep you safe on the road.
Brake Cables And Housing
Overview Of Brake Cables And Housing
Brake cables and housing are an integral part of a bike’s braking system. The housing protects the cables from dirt, grime, and corrosion, while the cables transmit the force from the brake lever to the brake calipers. Here are some essential points to keep in mind:
- Brake cables are made of stainless steel or galvanized steel.
- Brake housing is made of either plastic or aluminum.
- The brake cables connect the brake levers to the brake calipers, while the housing protects the cables from damage and maintains their shape.
- The housing is typically routed along the bike’s frame and fork, ensuring that the cables are out of the way of any moving parts.
Step-By-Step Instructions For Replacing Brake Cables And Housing
Replacing brake cables and housing may seem like a daunting task, but with some basic tools and a little patience, you can do it yourself. Here are the steps:
- Begin by removing the old cables and housing from the bike.
- Use a cable cutter to cut the housing to the correct length.
- Insert the new cable into the housing and thread it through the bike’s frame.
- Attach the cable to the brake lever and caliper.
- Adjust the cable tension until the brakes operate correctly.
- Check that the brakes engage and release smoothly and that the brake housing is lying flat against the frame.
Tips For Maintaining Brake Cables And Housing
Maintaining brake cables and housing properly will keep them working smoothly and extend their lifespan. Here are some tips to help you:
- Inspect the brake cables and housing regularly for any signs of wear, fraying, or corrosion.
- Clean the housing to remove any dirt or grime that might cause it to bind.
- Lubricate the cables periodically with a light oil to prevent rust and corrosion, but don’t overdo it.
- Use a cable cutter to cut the housing cleanly and prevent it from fraying.
- When installing new cables and housing, make sure that they are the correct length and routed correctly to avoid binding.
- Don’t forget to adjust the cable tension and brake alignment after replacing the cables and housing.
By following these tips, you can keep your bike’s braking system in top condition. Remember to inspect and maintain the brake cables and housing regularly, and you’ll enjoy smoother, more responsive braking for years to come.
Brake Levers
Explanation Of The Importance And Function Of Brake Levers
Brake levers are an essential component of a bike’s braking system. They are crucial to controlling your bike’s speed and stopping when you need to. Brake levers are typically located on the handlebars, and they’re the part of the bike that you squeeze to slow down or stop.
When you pull the levers, they activate the brake cables, which apply pressure to the brake pads and slow down or stop your wheels. Without brake levers, there would be no easy way to control your speed or stop on a bike.
Discussion Of The Different Types Of Brake Levers Available
There are mainly two types of brake levers available for bikes, including:
- Drop bar brake levers: These levers are found on road bikes and are designed to fit drop-style handlebars. They’re lightweight and relatively easy to use, and they offer a secure and aerodynamic grip.
- Flat bar brake levers: Flat bar brake levers are designed to fit straight handlebars, and they’re typically found on hybrid and mountain bikes. They offer more precise control and an improved grip.
Both types of brake levers are made from a range of materials, including carbon fiber, aluminum, and steel. However, most riders generally prefer aluminum due to its lightweight and durable nature.
Step-By-Step Instructions For Replacing Brake Levers
If your brake levers are worn or damaged, replacing them is a relatively easy process. Here are step-by-step instructions to guide you through:
- Remove the cables from the old brake lever by loosening the cable tension adjuster on the brake, then detaching it from the bolt on the brake lever.
- Unscrew the bolt that holds the brake lever to the handlebar using a hex wrench, and slide off the old brake lever.
- Slide on the new brake lever, position it as required, and fasten it to the handlebar with a hex wrench.
- Once the brake lever is in place, reattach the brake cables. Make sure to adjust the cable tension, so the brakes function as intended.
- Check to ensure that the brake lever is secure and working correctly before riding.
Tips For Maintaining Brake Levers
To ensure that your brake levers remain in good condition and function correctly, here are some tips to keep in mind:
- Periodically tighten the bolts that hold the brake lever to the handlebars to keep them secure.
- Replace worn or damaged brake levers promptly.
- Keep the brake levers clean, free from grime, and well-lubricated.
By following these tips, you can extend the life of your brake levers and ensure your bike remains safe and functional.
Brake Calipers
Overview Of Brake Calipers
Brake calipers are a crucial component in a bike’s braking system. They are responsible for squeezing the brake pads against the wheel’s rim, which slows the bike’s movement. A malfunctioning brake caliper can cause a lot of problems, such as lack of stopping power, uneven wear in brake pads, and reduced control over bike steering.
Hence, it is essential to know about the different types of brake calipers, replacing them, and maintaining them.
Discussion Of The Different Types Of Brake Calipers Available
There are two widely used types of brake calipers available in the market: rim brake calipers and disc brake calipers.
Rim Brake Calipers
Rim brake calipers are conventional brakes that squeeze the brake pads against the bike’s wheel rim. They usually come in single and dual-pivot types. Single-pivot calipers operate on the principle of a central pivot point, whereas dual-pivot calipers have two pivot points that provide increased leverage and stopping power.
Disc Brake Calipers
Disc brakes calipers are more advanced and provide better stopping power. They work by squeezing brake pads against a rotor that is attached to the wheel hub. Compared to rim brakes, they are more consistent in wet conditions and last longer.
They can be further classified into two types: mechanical and hydraulic disc brakes.
Step-By-Step Instructions For Replacing Brake Calipers
Replacing brake calipers is a job that can be done at home if you have the right tools and mindset. Here are the step-by-step instructions you need to follow:
- Gather the tools you’ll need. These include a wrench, brake pads, and the new brake caliper.
- Remove the wheel from the bike.
- Remove the old brake caliper by loosening the bolt and removing the cable.
- Install the new brake caliper in the same position as the old one and tighten the bolts.
- Attach the cable to the new caliper and adjust the tension appropriately.
- Align the brake pads with the rim and check if the brake is working correctly.
- Finally, re-install the wheel and test the brake’s effectiveness thoroughly.
Tips For Maintaining Brake Calipers
To keep your brake calipers functioning correctly, here are some maintenance tips you can follow:
- Check the brake pads regularly. If they are worn out, replace them immediately.
- Clean your brake pads after each ride to remove dirt and grime that can cause them to slip.
- Lubricate brake calipers and cables to reduce friction and increase the brake’s efficiency.
- Check the brake pads’ alignment regularly and adjust them if necessary.
- Finally, check the brake cables for wear and replace them if they are damaged.
By following these maintenance tips, you can ensure that your brake calipers will function correctly and protect you while riding.
Troubleshooting Common Issues
Bicycling is an excellent way to stay active, but sometimes bike brakes can present problems. Fortunately, troubleshooting bike brake issues is relatively simple. We’ll discuss some common brake issues and provide tips for diagnosing and solving those problems.
Discussion Of Common Brake Issues And How To Troubleshoot Them
Sometimes it can be hard to know what the issue with a bike’s brake is. However, by paying attention to how the brake lever feels, the sound it makes when stopping, and the resistance, it’s usually possible to identify common brake issues and how to fix them.
- Brake rub: This issue is prevalent when the brake pads press against the wheel rim and make a grinding noise. To resolve the issue, ensure the brake caliper is correctly aligned and the wheel hub is firmly placed in the dropouts.
- Spongy brakes: If the lever feels soft or spongy, it means there’s air in the brake system. You can fix this problem by bleeding the brake system, replacing the fluid, and ensuring a proper bleed process.
- Brake drag: If there’s resistance to turning the wheel even after the bike is stopped, the brake pad is rubbing against the rim. To fix this issue, adjust the brake lever set screw and the cable tension.
Tips For Diagnosing And Solving Brake Problems
Troubleshooting bike brake problems can be challenging, but here are tips to help identify and fix them.
- Inspect your brakes regularly: Checking for wear on brake pads or misalignment calipers, or visually inspecting the wheel will help to identify potential problems.
- Adjust the brake pads: When brake pads wear, adjust the pad position to maintain stopping power. Ensure the pads don’t rub against the tire or make contact with wheel spokes.
- Clean and lubricate the brake system: Accumulated grime and dirt can affect the brake’s performance and cause noise when braking. Ensure to clean and lubricate the brake system regularly.
- Be knowledgeable about brake components: Familiarize yourself with the various brake system components such as caliper, brake pads, and brake housing. Knowledge of these parts will help identify and resolve brake issues.
Although bike brakes can present issues, as long as a cyclist remains vigilant with regular maintenance and understanding the components’ function, diagnosing and fixing brake issues become relatively simple.
Professional Techniques For Maintenance
Advice On How To Maintain Your Bike’S Brakes Like A Pro
As a pro, you know that maintaining bike brakes is crucial for a smoother and safer ride. Here are some tips to help you keep your bike brakes in excellent condition:
- Regular inspection is key to ensure that the brake system is working correctly. Check the pads, cables, and calipers for wear and tear regularly.
- Keep the brakes clean by wiping them with a clean cloth and some water. Avoid using harsh chemicals that might damage the brake pads or discs.
- Adjust the brake pads if they are worn out or misaligned. For rim brakes, adjust the pads so that they are flush with the rim. For disc brakes, realign the calipers and adjust the pad-to-rotor clearance.
- Lubricate the cables and pivots with some bike-specific lubricant. This helps to ensure a smooth and consistent performance.
- Test the brake system before you ride by applying the brakes gently to ensure they are responsive. Make sure you check that everything is working as it should before heading out.
Discussion Of Advanced Techniques For Brake Maintenance
Maintaining bike brakes is one thing, but taking things up a level to truly master bike brake maintenance requires some advanced techniques. Here are some advanced techniques to consider:
- Bleeding hydraulic brakes is an advanced technique that requires special tools and some experience. This is necessary to remove air bubbles that can compromise the brake system’s performance.
- Replacing the brake pads is an advanced technique that requires basic bike maintenance knowledge. However, installing an incorrect pad with the wrong compound can damage the rotor or lead to a reduction in braking power.
- Upgrading the brake system with higher quality components or switching to a hydraulic brake system can have a significant impact on a bike’s braking performance. However, this is an advanced technique that requires some knowledge of the different brake systems and components available.
- Maintaining a constant brake temperature is another advanced technique that can help ensure consistent braking performance. Brakes can overheat, leading to reduced performance and wear. You may want to consider using cooling fins, larger rotors, or switching to a ventilated rotor to maintain brake temperature control.
Safety Tips
Overview Of Safety Guidelines For Repairing Bike Brakes
When it comes to repairing your bike brakes, there are a few safety guidelines that you should always follow to minimize the risk of accidents and injuries. Below are some of the key points to keep in mind:
- Always wear safety gloves and goggles, as you may come into contact with sharp edges or chemicals.
- Make sure the bike is stable and secure before starting any work, such as by using a repair stand.
- Always use the correct tools for the job, as using inappropriate tools can lead to further damage.
- Take care with removing and reinstalling parts, as applying too much force could cause damage to the brake system.
- Check the condition of the brake pads, cables, and levers before attempting any repairs.
Tips For Safe And Effective Brake Repair
In addition to following the general rules for bike repair safety, there are several tips you can use to ensure that your brake repair is effective and safe.
- Start by examining the brake pads and evaluating the level of wear. If they are worn down to the metal, it is time to install new brake pads.
- Clean the brake components to remove any dirt or grime that may have accumulated.
- Adjust the brake cables to ensure that the brakes are responsive and tight. This will help to maximize stopping power.
- Check the brake levers and adjust the tension as needed. This will ensure that the brake system is working at optimal capacity.
- Finally, test the brakes to ensure that they are functioning properly before taking your bike out for a ride.
Remember to always prioritize safety when repairing your bike’s brakes to minimize the risk of injury and ensure a smooth ride.
Frequently Asked Questions On What Tool Do I Need To Adjust Bike Brakes
What Tools Do I Need To Adjust Bike Brakes?
You will need an allen wrench, pliers, adjustable wrench, and a bike-specific brake tool.
Why Are My Bike Brakes Rubbing?
Your bike brakes might be rubbing due to misaligned brake pads, bent rotor, or loose brake caliper bolts.
How Tight Should Bike Brake Pads Be?
Your bike brake pads should be close to the rim but not touching it. You should hear a slight rub when the brakes are applied.
How Do I Adjust The Brake Lever On My Bike?
To adjust the brake lever on your bike, locate the barrel adjuster on the brake lever, turn it clockwise to tighten or counterclockwise to loosen the brake cable tension.
Conclusion
Adjusting bike brakes is essential for a safe and comfortable ride, and for this, having the right tool is crucial. As we have discussed in this post, the tools required to adjust bike brakes are not complicated or expensive. A set of allen keys, screwdrivers, and pliers will do the job for most types of brakes.
However, some specific brake types may require specific tools, and it is always wise to consult with a bike mechanic or follow the manufacturers’ guidelines before attempting to adjust the brakes yourself. By regularly checking and maintaining your bike’s brakes, you can ensure that they are working efficiently and safely.
With a basic knowledge of the tools required, you should be confident enough to adjust your bike’s brakes and enjoy a safe and smooth ride. So, get out there, grab those tools, and start maintaining your bike brakes today!