
To re-tape a road bike’s handlebars, remove the old tape and clean the handlebars before wrapping the new tape tightly while overlapping each wrap to secure it in place. Handlebar tape on a road bike can wear down over time due to constant use and exposure to outside elements.
Re-taping the handlebars can not only give the bike a new look but also improve the rider’s grip and comfort during long rides. Properly wrapping new handlebar tape involves cleaning the handlebars, choosing the right tape, and securing the tape in place with precise tension.
This guide will walk you through the steps required to re-tape your road bike handlebars, ensuring a clean and durable grip for your rides to come.
Credit: www.bicycling.com
Steps To Re-Tape Your Road Bike Handlebars
How To Re-Tape Your Road Bike Handlebars
Whether you’re upgrading your bike or repairing your old one, re-taping your road bike handlebars is an easy and affordable way to enhance the look and feel of your ride. With just a few essential tools and materials, you can transform your handlebars and give them a fresh, new look.
Here’s how to re-tape your road bike handlebars in just a few simple steps.
Preparing The Tools And Work Area
Before you can re-tape your road bike handlebars, you’ll need to gather a few essential tools and materials. Here’s what you’ll need:
- New handlebar tape
- Scissors or a utility knife
- Electrical tape
- Rubbing alcohol or degreaser
- Clean rag
To get started, find a clean, well-lit area to work on your bike. Ideally, you want to have a stable surface where you can lay your bike down and have room to move around it.
Removing The Old Tape
Now that you have your tools and a suitable work area, it’s time to remove the old tape from your handlebars. Here’s how:
- Remove the brake levers and shifters from the handlebars.
- Peel off the old tape gently and ensure you don’t damage any wires.
- Clean your handlebars with rubbing alcohol or degreaser to remove any residue left behind by the old tape.
- Allow the handlebar to dry completely before moving on to the next step.
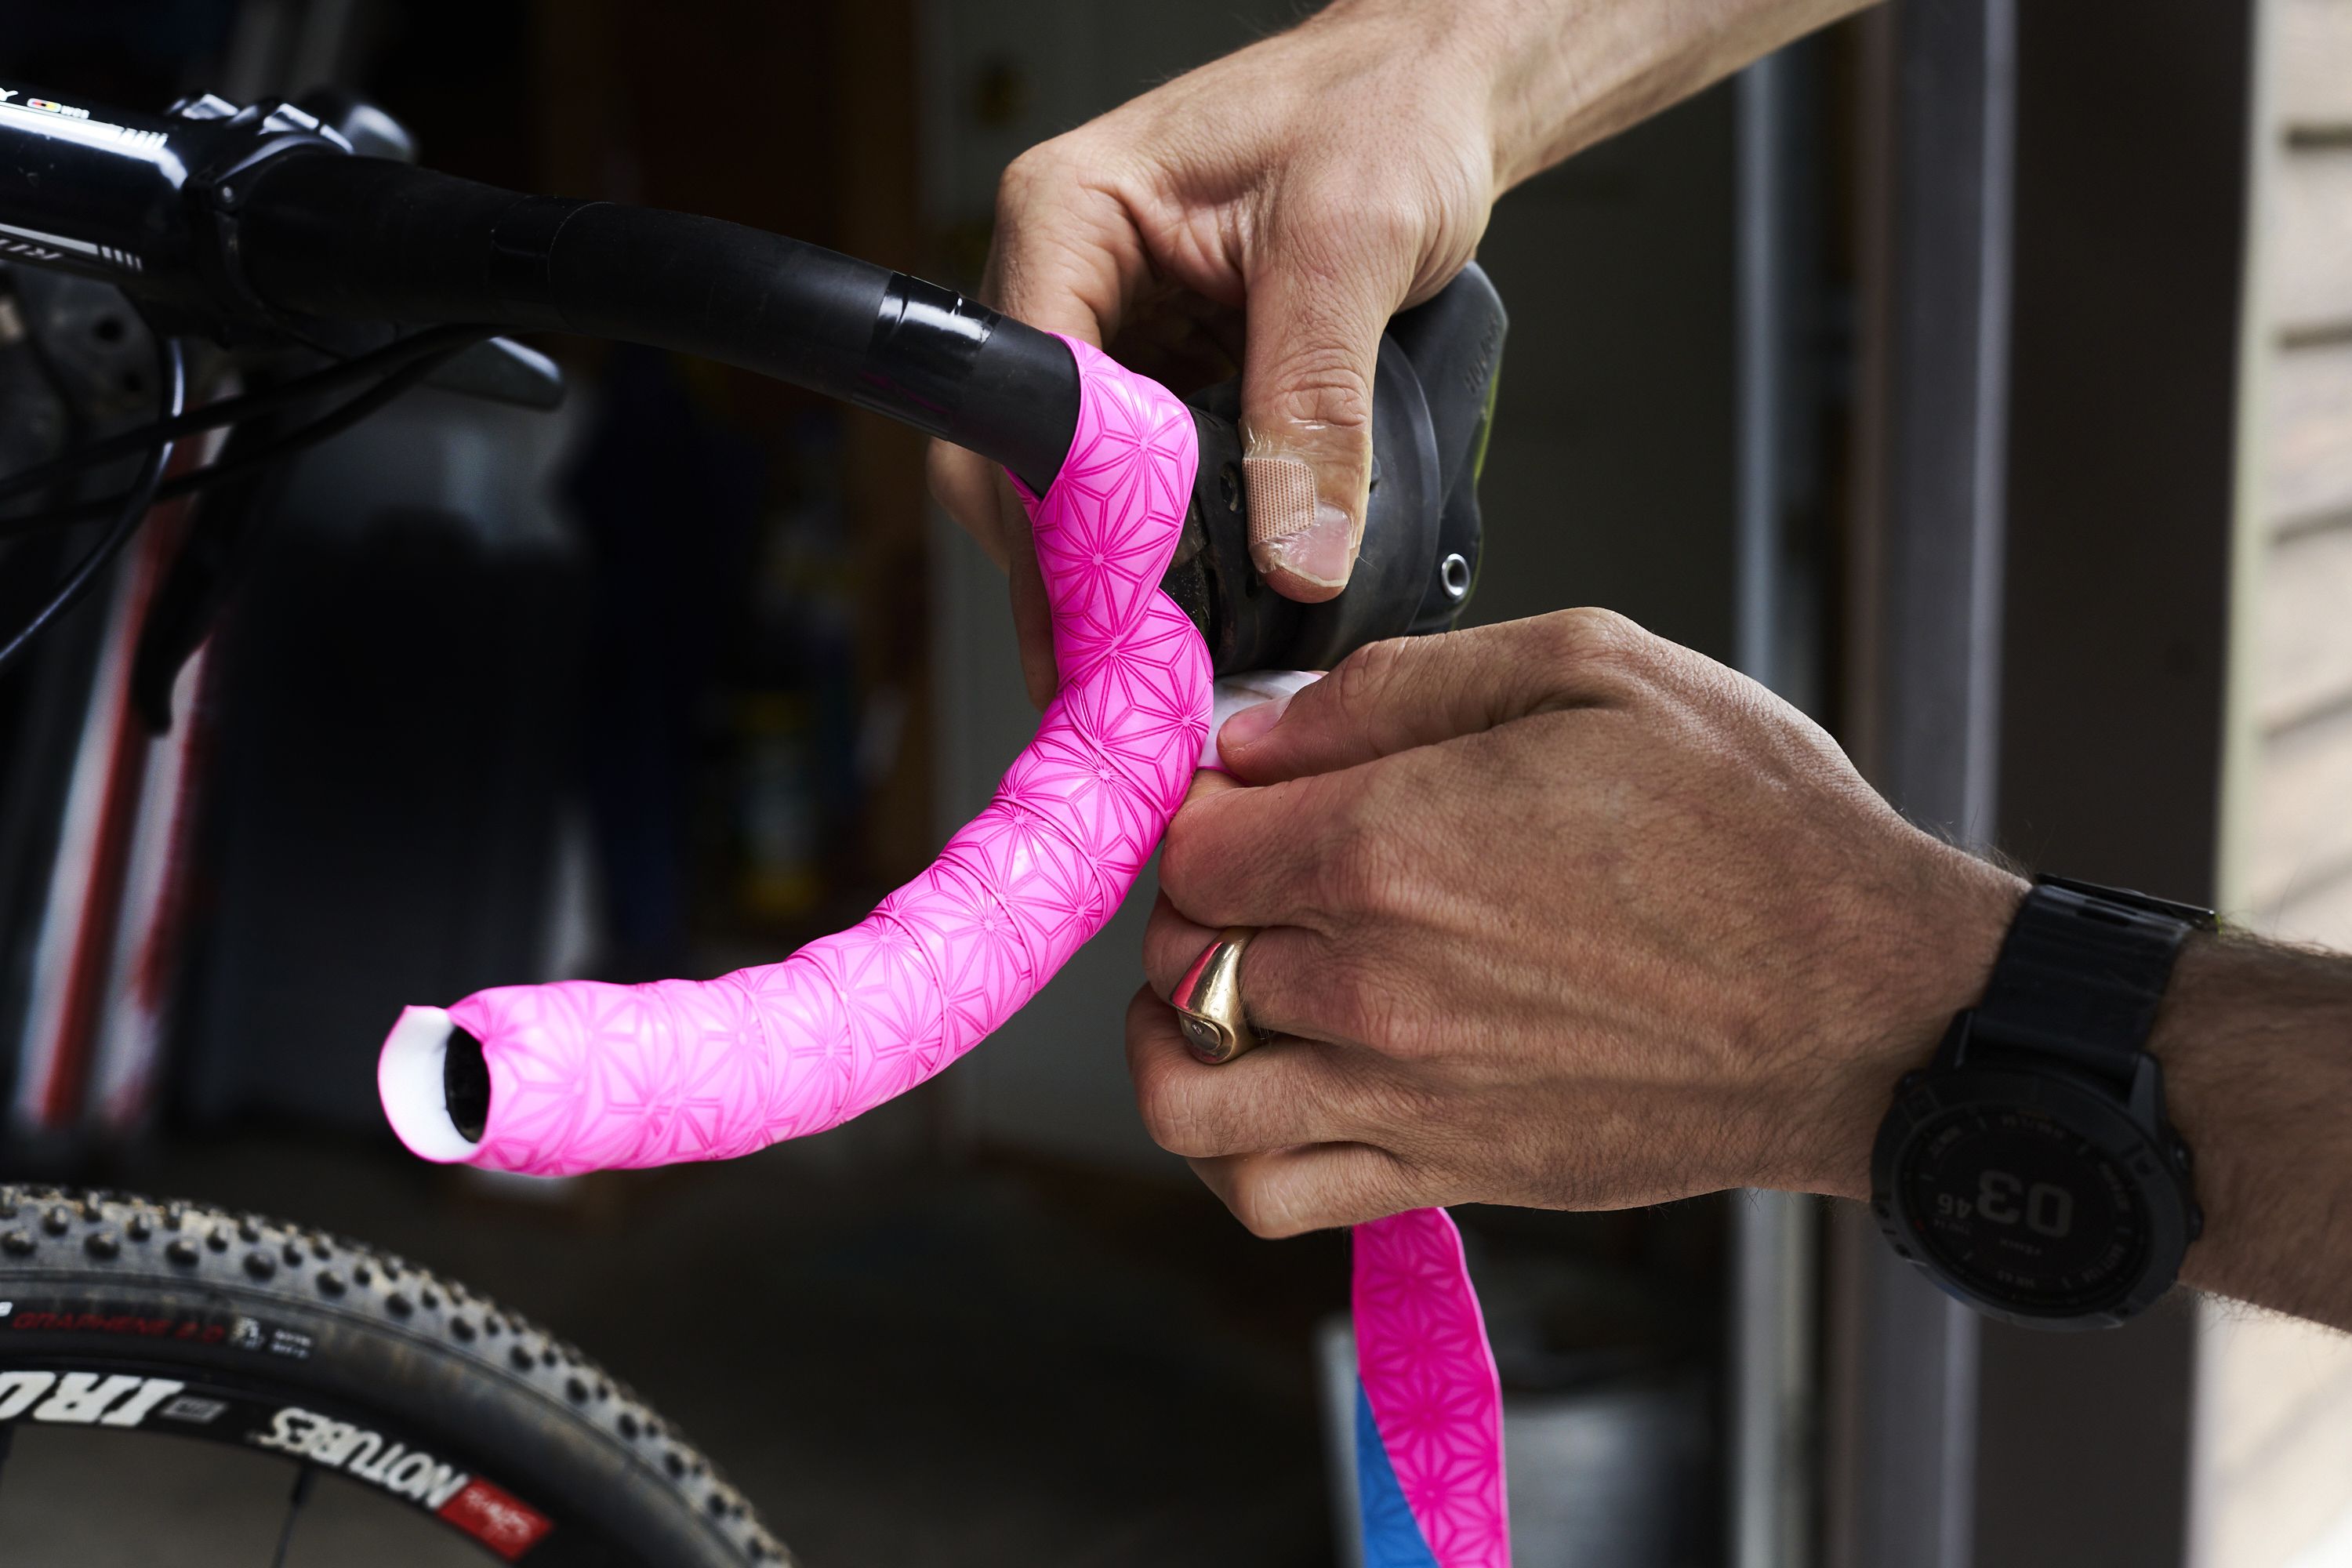
Applying The New Tape
Once you’ve removed the old tape and cleaned your handlebars, it’s time to apply the new tape. Here is how:
- Start by unrolling the new tape and aligning the end of the tape with the bottom of the handlebar.
- Wrap the tape around the handlebar from bottom to top, overlapping each layer by about half of its width.
- Pull the tape tightly as you wrap it around the handlebars to ensure a snug fit.
- Continue wrapping until you reach the brake lever and shifter area.
- Cut the tape to fit around the brake and shifter components.
- Secure the end of the tape with electrical tape.
Finishing Up
You’re almost finished! All that’s left to do is tidy up the ends, secure loose edges, and give the tape a final stretch for a smooth finish. Here’s how:
- Cut off any excess tape with scissors or a utility knife.
- Use electrical tape to secure loose edges and tidy up the ends of the tape.
- Stretch the tape a final time for a clean, tight fit.
- Re-attach the brake levers and shifters to complete the job.
Re-taping your road bike handlebars is an easy and affordable way to freshen up your bike and enhance your overall cycling experience. By following these simple steps, you can have your handlebars looking and feeling like new in no time.
Happy riding!
Tips And Tricks For Re-Taping Road Bike Handlebars
Discussing What Not To Do While Taping Handlebars
When taping your road bike handlebars, it’s imperative to do it right, as handlebars act as the bike’s control center. However, there are common mistakes people make when taping handlebars. Here are a few things you need to avoid:
- Not removing the old tape properly: Before taping your handlebars with a new tape, make sure to clear off the remnants of the old tape. Leaving the old tape on can make the handlebars look lumpy and cause skin irritation when riding.
- Stretching the tape too taut: It’s a common mistake to stretch the tape too much, making it hard to control your bike. Make sure to keep the tension even to eliminate lumps and create a comfortable grip.
- Wrong positioning of the tape: Incorrect positioning of the tape can either make the hand grip too small, making it hard to hold or too large, making it difficult to reach the brakes. Always make sure the tapes are in the right position before beginning to tape.
Tips For Customizing Handlebar Tape Styling
Customizing your handlebars not only gives your bike a neater and more personalized look but can also make the grip more comfortable. Here are a few tips to customize your handlebar tape styling:
- Select the appropriate color: A matching colored tape can give your bike a streamlined finish, while a contrasting color can make your bike look trendy.
- Add textures and patterns: You can play with textures and patterns to make your handlebars stand out. Leather, cork, and carbon fiber textured tapes can offer a comfortable grip and give your bike a stylish touch.
- Play with different taping techniques: You can create unique designs on your bike simply by playing around with different taping techniques.
Explanation Of Different Taping Patterns
There are several taping patterns, and each one offers a unique grip, giving the bike a new look and feel. Here are some popular taping patterns.
- The traditional over-under pattern: The over-under pattern offers a classic look and is easy to create. It provides a comfortable grip with the right amount of cushioning.
- The figure-eight pattern: The figure-eight pattern is favored for having better shock absorption and more cushioning on rough terrain. However, this style is more complicated than the traditional over-under technique.
- The stacked pattern: The stacked pattern involves overlapping the tape over itself rather than wrapping it tightly around the bar. This creates a thicker grip with better shock absorption and is ideal for those who prefer riding on rough terrains.
How To Ensure An Even Tape Wrap
Making sure that the tape wrap is even is crucial in creating a comfortable grip. Here are some tips to ensure even tape wrapping:
- Start from the edge: Start wrapping the tape from the end of the handlebar and work your way towards the center or stem.
- Overlap the tape: Make sure to overlap the tape with the same amount for every wrap, ensuring the tape stays even all through the handlebar.
- Smooth the tape: When wrapping the tape, make sure to smooth it out to avoid lumps and bumps on your handlebars.
Importance Of Maintaining Proper Tape Tension
Maintaining proper tape tension throughout the grip is essential in creating a comfortable grip and providing the right amount of cushioning. Applying too much tension can make the handlebar tape too tight and uncomfortable to hold, while applying less tension can create lumps and bumps on the bar.
Here are a few tips to maintain proper tape tension:
- Keep the tape wrapping even: Maintaining the same amount of overlap throughout the tape wrap can help maintain proper tape tension.
- Avoid tightening too much: Over-tightening the tape at the bends in the handlebars can make the tape bulge out, creating lumps and bumps.
- Alternate stretching the tape wrap: Alternate stretching the tape wrap for the right amount of tension, ensuring an even grip and making the bike look polished and professional.
Frequently Asked Questions Of How To Re Tape Road Bike Handlebars
How Often Should I Retape My Road Bike Handlebars?
It is recommended to retape your road bike handlebars once a year to maintain comfort and grip on your bike.
What Supplies Do I Need To Retape Road Bike Handlebars?
You will need new handlebar tape, scissors, electrical tape, and some alcohol wipes to clean the handlebars.
How Do I Wrap Road Bike Handlebars Without Getting Air Bubbles?
Start by wrapping the tape from the bottom, avoiding any air bubbles by slightly stretching the tape as you go.
Can I Reuse The Old Tape On My Road Bike Handlebars?
It’s not recommended to reuse old tape as it won’t provide the same level of grip and comfort as new tape.
Conclusion
Overall, re-taping your road bike handlebars can be a straightforward diy project. By following the steps outlined in this post, you can successfully remove old handlebar tape and install new tape that is comfortable, durable, and stylish. Remember to assess the condition of your handlebars and bar tape regularly to ensure optimal performance and safety.
Additionally, investing in quality materials and taking your time with the process can make a big difference in the outcome. Whether you are a seasoned cyclist or just starting out, mastering this essential skill will give you greater control and comfort when riding your road bike.
So, get out there and enjoy the ride!