
To fix a puncture on a road bike, you need to locate the puncture on the inner tube, remove the wheel from the bike, remove the tire, replace the inner tube, and reassemble the tire onto the wheel. Riding a road bike can be an exhilarating experience, but a flat tire can quickly take the joy out of it.
Punctures are one of the most common issues that cyclists encounter, and knowing how to fix them can save you time and money. Whether you’re a seasoned cyclist or a beginner, learning how to fix a puncture is an essential skill that can get you back on the road in no time.
In this article, we’ll explain the step-by-step process of fixing a puncture on your road bike, along with some tips to make the process smoother.
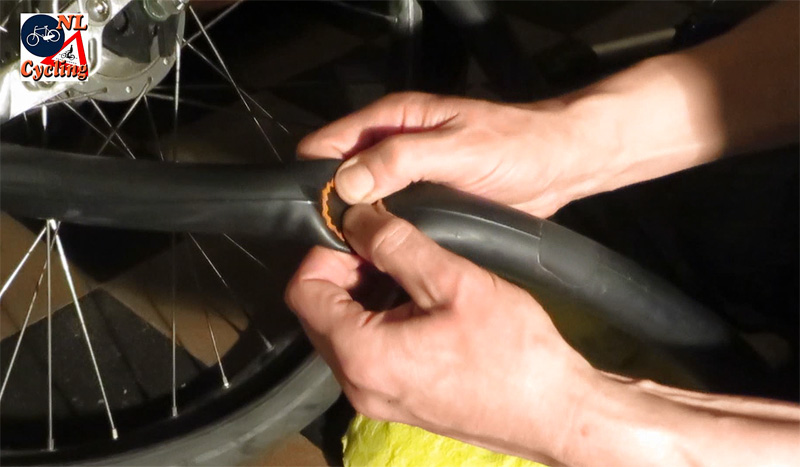
Credit: bicycledutch.wordpress.com
Identifying The Cause Of The Puncture
Spotting The Puncture On The Tire
One of the most common problems road bikers face is getting a flat tire. A flat tire can be frustrating, especially if you’re out cycling and far from home. However, it is essential to know how to fix the problem as it can happen at any time.
The very first thing you need to do when you have a flat tire is to locate the puncture. Look for the following signs:
- The bike feels unsettled or bounces more than usual
- The tire has lost air pressure
- A hissing sound can be heard when the wheel moves
Once you detect a puncture, you need to stop cycling and move to a safe location where you can repair the tire.
Inspecting The Tire For Damage
After locating the puncture, you need to inspect the tire for damage. Some damages are repairable, while some require a complete replacement of the tire. Here are the things to check:
- Check for cuts, punctures or slices in the tire.
- Check the tread of the tire to look for any objects, such as glass or thorns imbedded in the rubber.
- Pay attention to the sidewalls of the tire as they can also get damaged. A bulge or cut on the sidewall must be replaced as it is beyond repair.
Once you have detected the puncture and inspected the tire, the next step is to identify what caused the puncture. By identifying the problem, you can prevent it from happening again in the future. Here are some things to consider:
- Check if the puncture was caused by an object penetrating through the tire. If so, remove the object from the tire.
- Check if the tire is wearing down due to old age. If the tire is getting worn down, replace it.
- Check if your tire pressure is too low or too high. Underinflated tires are prone to punctures as the rubber is not supported, while overinflated tires are more susceptible to cuts.
- Check the type of road surface you are riding on. Some surfaces, such as gravel, are more prone to punctures than others.
By identifying the cause of the puncture, you can take steps to prevent it from happening again. Keeping your tires well-maintained and inflated to the correct pressure can help prevent punctures in the future.
Tools And Materials Needed
As a cyclist, it is essential to know how to fix a puncture on a road bike. You don’t need to be a mechanic to do this; all you need are the right tools and materials. Here are the things you’ll need to fix a puncture on your road bike:
Tires, Tubes, And Patches
The first thing you’ll need to fix a puncture is a new tire or tube. You can either buy them at a local bike shop or online. It’s also a good idea to have puncture patches with you in case you need to patch up a hole temporarily.
Remember to bring the same size you need, as there are different sizes and types of tires and tubes.
Tire Levers
Tire levers are essential for removing the tire from the rim. These come in packs of two or three and made from plastic or metal. The idea is to insert them between the tire and rim and lever the tire away from the rim.
This gives you enough space to remove the tube from inside.
Hand Pump Or Co2 Inflator
After fixing the puncture, you’ll need to inflate the tube. That’s where a hand pump or co2 inflator comes in, depending on your preference. You can choose a hand pump if you’re not in a hurry, or a co2 inflator if you want to inflate your tube fast.
Either way, make sure you have one with you every time you ride.
Protective Gloves
Lastly, wear protective gloves to keep your hands clean while handling the tire and tube. Gloves also protect your skin from getting pricked by any sharp object in the tire. You can use disposable gloves or any gloves you have at home as long as they are clean and fit you well.
Remember, having the right tools and materials is half the battle in fixing a puncture on a road bike. Don’t forget to bring them with you every time you go for a ride, and you’ll be ready to tackle any flat tire that comes your way.
Fixing A Front Wheel Puncture
There’s nothing worse than getting a flat while cycling. It’s frustrating, and it can quickly put a damper on your cycling session. Fortunately, fixing a front wheel puncture on a road bike is not as complicated as you might think.
Removing The Front Wheel
Before you start repairing your front wheel, you need to remove it from the bike’s frame. Here are the steps to remove the front wheel:
- Shift the gears to the smallest chainring and cog to make it easier to remove the wheel.
- Use the quick-release lever to loosen the front wheel.
- Lift the bike and remove the wheel by pulling it out of the dropouts.
Removing The Tire From The Rim With Tire Levers
Once you’ve removed the wheel, you need to remove the tire from the rim using tire levers. Here’s how:
- Insert the tire levers between the tire and the rim.
- Pry the tire levers upward to release the bead from the rim.
- Work your way around the tire, using the tire levers to loosen the bead from the rim.
Inspecting The Inner Tube For Damage
With the tire removed, you should inspect the inner tube for damage. Here’s what to look for:
- Check for holes or cuts on the tube’s surface.
- Check the valve for any signs of damage.
- Inflate the tube slightly and listen for any hissing sounds, indicating a leak.
Patching Or Replacing The Inner Tube
Depending on the damage, you may need to patch or replace the inner tube. Here’s how:
- If the damage is a small hole or puncture, you can patch the tube using a patch kit. Make sure to follow the manufacturer’s instructions.
- If the damage is too severe, you will need to replace the inner tube entirely. Make sure to get the right size inner tube for your tire and wheel.
Replacing The Tire
After fixing or replacing the inner tube, you can reattach the tire to the rim. Here’s how:
- Insert one bead of the tire into the rim.
- Work the other bead onto the rim using your hands.
- Inflate the tire slightly to make sure it’s seated correctly.
Inflating The Tire And Reattaching The Wheel
With the tire replaced, you can now reattach the wheel to the bike’s frame. Here’s how:
- Insert the wheel back into the dropouts.
- Tighten the quick-release lever until the wheel is secure, but not too tight.
- Inflate the tire to the recommended pressure.
Remember, fixing a front wheel puncture is not hard as long as you know what to do. With these easy diy steps, you’ll be back on the road in no time!
Fixing A Rear Wheel Puncture
Dealing with a punctured rear wheel on your road bike certainly isn’t the most exciting task but it’s one you’ll likely encounter at some stage. It’s important to know how to fix this issue on your own, as you don’t want to be stranded on the side of the road with no solution in sight.
Removing The Rear Wheel
Before fixing the puncture, the first step is to remove the rear wheel. Follow these steps:
- Shift your bike into the smallest rear gear to loosen the chain.
- Open the brake caliper to make it easier to remove the wheel.
- Pull the quick-release skewer out of the wheel to detach it from the frame.
Removing The Cassette And Chain From The Wheel
Once you’ve removed the wheel, you will need to deal with the cassette and chain before fixing the puncture. Follow these steps:
- Use a chain whip to secure the cassette in place.
- Use a cassette lockring tool to loosen the lockring on the cassette.
- Remove the cassette from the freehub body.
- Gently remove the chain and place it aside.
Removing The Tire From The Rim With Tire Levers
With the cassette and chain removed, you can focus on the tire. Here are the steps:
- Use two tire levers to hook the bead of the tire and pull it up and over the rim.
- Slide the levers around the circumference of the wheel, working the tire bead off the rim.
Inspecting The Inner Tube For Damage
Once the tire is removed, it’s time to inspect the inner tube. Follow these steps:
- Remove the inner tube from the tire.
- Inflate the inner tube to locate the puncture.
- Inspect the inner tube for other punctures or damage.
Patching Or Replacing The Inner Tube
If you’re dealing with a small puncture, you can patch the inner tube using a tire patch kit. If the puncture is significant or there is damage to the inner tube, it should be replaced. Follow these steps:
- If patching the tube, clean the surrounding area and apply the patch to the punctured area.
- If replacing the tube, insert a new one and partially inflate it.
Replacing The Tire
Before reattaching the wheel, it’s essential to examine the tire for any damage. Here are the steps:
- Check the tire for any debris embedded into the rubber. Remove any objects you find.
- Check the sidewalls and tread for any damage or wear.
- Replace the tire if it’s excessively worn or shows signs of damage.
Reattaching The Cassette, Chain And The Wheel
With everything else sorted, it’s time to put the wheel back on the bike. Follow these steps:
- Carefully slide the wheel back into the frame, ensuring the chain is correctly placed around the smallest rear gear.
- Reattach the quick-release skewer and carefully tighten it.
- Refit the chain, making sure it’s in good condition.
- Reattach the cassette, securing it with the lockring tool.
- Finally, inflate the tire to the correct pressure.
By following these simple steps, you should be able to successfully deal with a punctured rear wheel on your road bike. Always remember to check your bike’s components regularly, so that punctures are less likely to happen.
Frequently Asked Questions Of How To Fix A Puncture On A Road Bike
How Do You Know If You Have A Puncture On Your Road Bike?
You may notice a hissing sound or feel the tire becoming flat. Check for debris or holes in the tire.
What Tools Do You Need To Fix A Puncture On A Road Bike?
You will need tire levers, a spare inner tube, a pump, and a puncture repair kit.
How Do You Fix A Puncture On A Road Bike?
Remove the wheel, take off the tire, locate the puncture, remove the inner tube, replace with new tube or repair, put back tire, inflate to correct pressure and reattach wheel.
Conclusion
After reading this blog post, you now have a complete understanding of how to fix a puncture on your road bike. It can be a frustrating experience to encounter a flat tire while cycling. However, with the right tools and knowledge, fixing a puncture can be a relatively straightforward process.
Remember to always carry a puncture repair kit with you on your rides, and practice changing a tire at home until you feel comfortable doing it on the road. By following the steps outlined in this post, you can confidently repair a puncture and get back to cycling in no time.
Taking care of your bike and addressing flat tires promptly will ensure that you can keep enjoying your rides for years to come!