
Bleeding bike brakes without a kit can be done by draining old brake fluid and replacing it with new fluid. This process requires a few tools and some patience, but can be done easily at home.
Maintaining your bike’s brakes is essential for your safety on the road or trail. Bleeding the brakes involves removing air bubbles from the brake lines, which can decrease the brake fluid’s effectiveness. While there are many kits available for bleeding bike brakes, you can do it without a kit using only a few tools and a bottle of brake fluid.
This guide will walk you through the steps to properly bleed your bike brakes without a kit, so you can ride with confidence.
Credit: blog.pro-x.com
Understanding Brake Bleeding And Why It’S Important
Brakes are one of the essential safety features of a bike. However, the brake system is not perfect. Over time, the hydraulic fluid in the brake lines can become contaminated or discolored, causing a decline in braking performance. That’s where brake bleeding comes in.
What Is Brake Bleeding?
Brake bleeding is the process of removing the old and contaminated brake fluid from the brake lines and replacing it with fresh and clean fluid. The goal is to remove any air bubbles that have built up in the brake lines, which can cause spongy or inconsistent braking, and to restore the brake’s proper function.
When you apply the brakes, the force you exert is transferred from the brake lever or pedal to the brake caliper, which squeezes the brake pads against the rotor to slow down or stop the wheel rotation. Brake fluid, which is stored in a reservoir, transmits that force by hydraulics, but the process includes air bubbles.
Brake bleeding ensures that the hydraulic system is free from any air pockets.
Why Is Brake Bleeding Necessary?
Brake bleeding is crucial for maintaining your bike’s optimal braking performance. Here are some reasons why:
- Improved brake response: Bleeding the brakes is essential because it removes trapped air, which can significantly impact braking performance and cause a spongy sensation.
- Safety: Properly functioning brakes are crucial for your safety while riding a bike. Brake bleeding ensures that your brakes are operating efficiently and can prevent accidents.
- Reduced wear and tear: Brake fluid tends to absorb moisture over time, which can lead to corrosion and wear and tear of brake parts. Bleeding the brakes and replacing the old fluid with fresh fluid extends the life of brake system components, saving you money in the long run.
What Happens If You Don’T Bleed Your Bike’S Brakes Regularly?
Neglecting your bike’s brake system can lead to significant issues. Here are some reasons why you should not skip regular brake bleeding:
- Poor braking performance: Contaminated brake fluid can result in a decrease in braking performance, which may not seem too noticeable at first, but as time passes, it can get worse and can lead to an unsafe riding experience.
- Damage to brake parts: Moisture in brake fluid can lead to corrosion within the brake lines, calipers, and master cylinders, causing irreparable damage to the braking system.
- Costlier repairs: Skipping brake bleeding could result in more significant issues, leading to expensive repairs and component replacements.
Understanding brake bleeding and why it’s important is crucial for maintaining your bike’s optimal braking performance, ensuring your safety while riding, and saving you money in the long run. So, make sure to bleed your bike’s brakes regularly to avoid any significant issues.
Step-By-Step Guide To Bleeding Your Bike’S Brakes Without A Kit
How To Bleed Bike Brakes Without Kit: A Step-By-Step Guide
When it comes to maintaining your bike, one crucial aspect is ensuring that your brakes function correctly. Bleeding your bike’s brakes is a necessary procedure that removes air bubbles from your brake lines, and it can help restore the performance of your bike’s brakes.
However, what do you do when you don’t have a kit readily available? Well, don’t worry – you can still bleed your bike’s brakes without a kit by following this step-by-step guide.
Gather The Tools You Need
You’ll need to gather a few essential tools before starting the brake bleeding process. These include a few clean rags, a bottle of brake fluid (check your owner’s manual to ensure you use the right type of fluid), a small wrench, and an appropriate-sized hose.
Prepare Your Bike For Brake Bleeding
Before starting the bleeding process, ensure that your bike is stable on a bike stand or upside down. Also, make sure the bike’s handlebars are secure and level.
Identifying The Bleeding Ports And Fittings
Locate the bleed valve and caliper situated on your bike’s brake system. To identify the bleed valve, look for a small rubber cap on your brake lever’s topmost part. While the caliper is located on the brake’s rotor and fastened on the wheel’s fork.
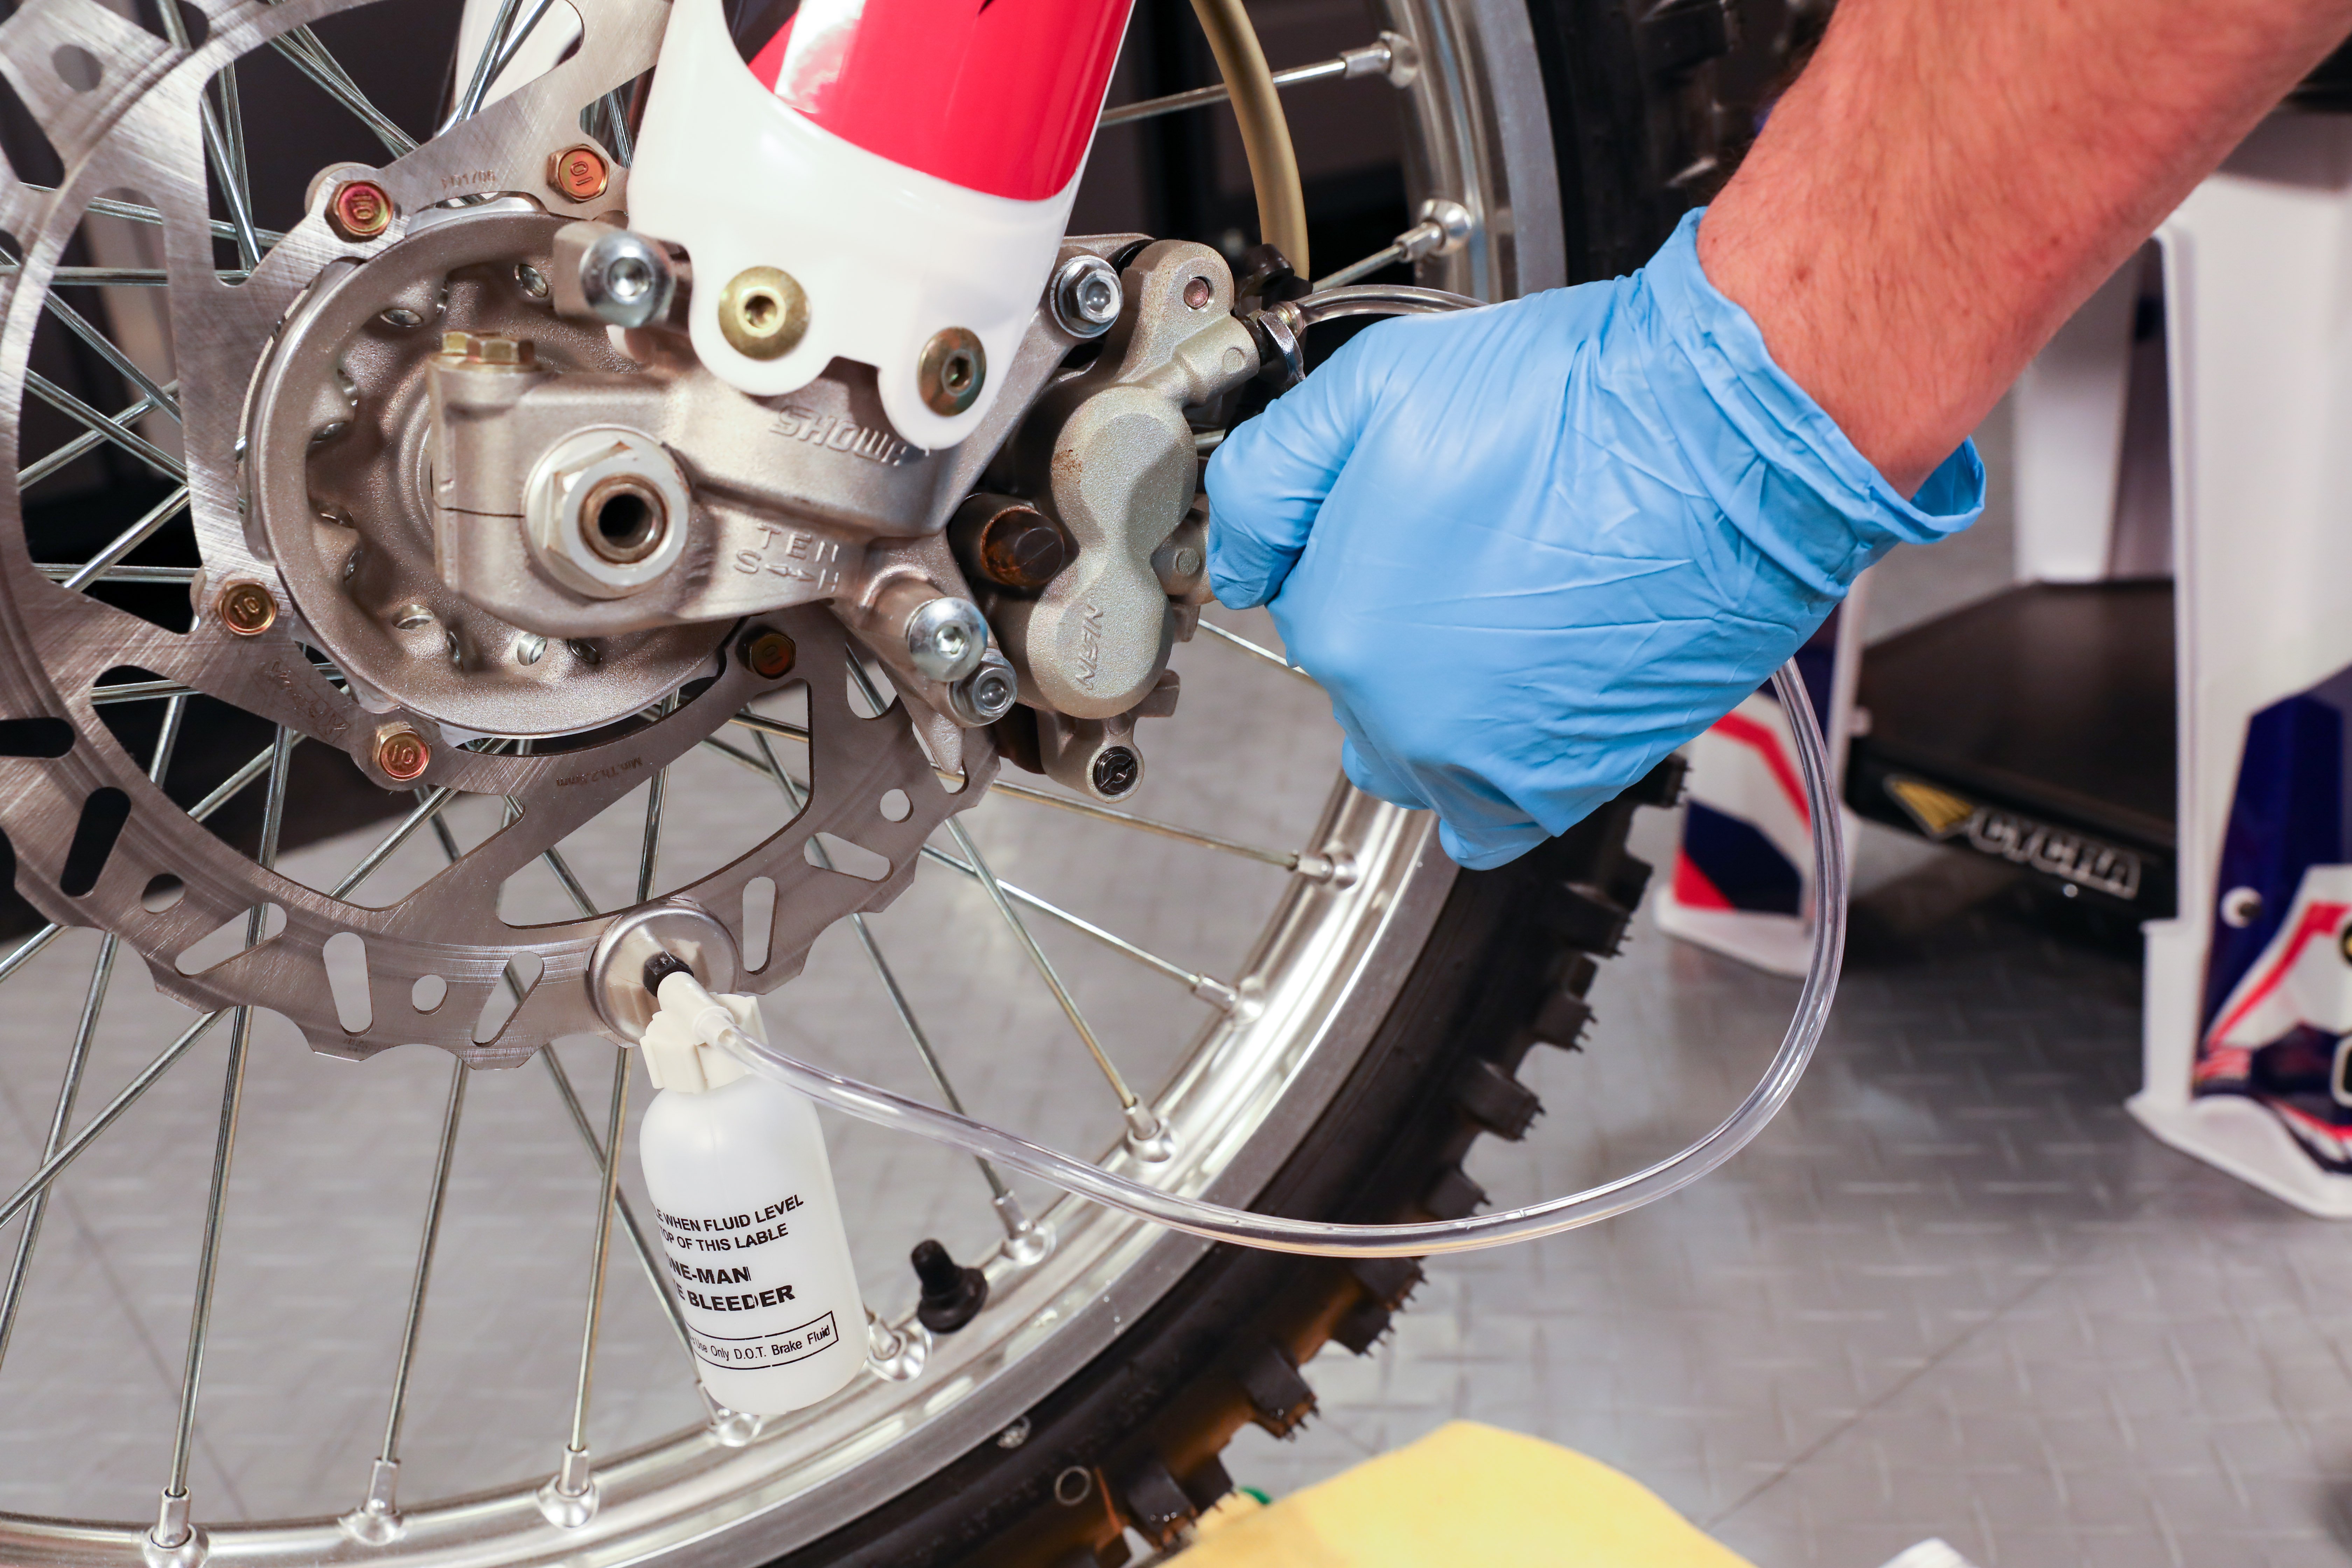
Connecting The Brake Line To The Bleed Valve And Caliper
Attach the hose to the brake’s bleed valve and then secure the other end to a catchment container. Likewise, attach the hose to the caliper bleeder screw. Make sure the hose is snugly held in place.
Starting The Bleeding Process
With both hose ends in position, turn the brake lever’s adjustment screw to approximately 45 degrees counterclockwise. Release the valve, making sure brake fluid exits through the hose and into the container. Close the valve before releasing the brake lever.
Removing Air Bubbles From The Brake Line
Squeeze the brake lever smoothly, then return it to its initial position. This procedure brings the brake’s fluid through the hose, which eases the removal of the air bubbles inside the brake’s system. Repeat this action several times until there are no more air bubbles in the brake’s fluid.
Refilling The Brake System With Brake Fluid
Examine the brake’s fluid level regularly during the bleeding process; generally, it’s best to keep it at two-thirds level. Once bleeding is complete, refill the reservoir to the recommended level and replace the lid.
Checking The Brake System For Leaks And Ensuring Proper Brake Function
Check for any leaks, then operate the brake lever a few times to make sure everything is in order. Make sure you’ve tightened the supply hoses, and screws are in place as they should be. Give your bike a quick test, and voila – your bike’s brakes are now bled and functioning correctly.
Remember that practice makes perfect – try this a few times to become comfortable with the process. With this easy-to-follow guide, you should have an easy time bleeding your bike’s brakes without a kit.
Common Challenges And Solutions When Bleeding Bike Brakes Without A Kit
Dealing With Stubborn Air Bubbles In The Brake Line
Air bubbles in your brake system can be a frustrating problem when bleeding bike brakes without a kit. Here are some tips to help solve this issue:
- Try tapping the brake caliper and brake lever to help dislodge the air bubbles.
- You can also try holding the caliper higher than the lever to allow bubbles to rise up and out of the system.
- Another method is to use a rubber band or zip tie to hold the brake lever in the compressed position overnight to allow any trapped air to escape.
How To Ensure You Don’T Overfill Or Underfill Your Bike’S Brake System
Proper filling of your bike’s brake system is crucial during the bleeding process. Here are some tips to avoid overfilling or underfilling:
- Follow the manufacturer’s recommended amount of brake fluid for your bike.
- Do not fill the reservoir above the maximum fill line.
- Check and refill the brake fluid frequently during the bleeding process to make sure it doesn’t run empty.
- Keep a container nearby to catch any extra brake fluid that spills during the process.
Identifying And Correcting Common Brake Bleeding Mistakes
Mistakes in bleeding your bike brakes can lead to reduced performance or even complete brake failure. Here are some mistakes to avoid:
- Make sure to open and close the bleed screws in the correct order (furthest from the brake lever first, closest last).
- Use a proper bleed kit or syringe to avoid introducing air bubbles or contaminants into the system.
- Keep the brake fluid clean and avoid mixing different types of brake fluid.
- Check for leaks and tighten all screws before finishing the bleeding process.
By following these tips, you can avoid common challenges while bleeding bike brakes without a kit. Keep in mind that proper bleeding is crucial for your safety and the performance of your bike, so take your time and follow the instructions carefully.
Frequently Asked Questions On How To Bleed Bike Brakes Without Kit
Can I Bleed My Bike Brakes Without A Kit?
Yes, you can. All you need is a syringe, tubing, and mineral oil or dot brake fluid.
How Often Should I Bleed My Bike Brakes?
You should bleed your bike brakes every 6-12 months or when the brake lever feels spongy.
Why Are My Brakes Still Spongy After Bleeding?
Your brake system may have air trapped in it. Bleed again or take it to a professional.
Can I Use Water Instead Of Brake Fluid?
No, you cannot use water. Water will cause rust and corrosion, and it will not work as a brake fluid. Always use the recommended brake fluid.
Conclusion
Bleeding bike brakes can be a daunting task, but with the right tools and techniques, it can be accomplished without a kit. By following the steps laid out in this guide, you can confidently get your brakes working like new again.
Remember to take your time and be patient, as rushing can lead to mistakes. Your safety is of utmost importance, and having properly functioning brakes is essential for a smooth and safe ride. Whether you are a seasoned pro or a beginner, this guide has provided you with the basic steps to bleed your bike brakes without a kit.
Give it a try and enjoy a smoother, safer ride. Don’t forget to share this guide with your fellow cyclists to help them keep their brakes working smoothly too!